Monday, December 2, 2013

Thanksgiving break progress

With a couple of extra days off from work for Thanksgiving, it was a perfect opportunity to make some good progress on the left and right ailerons.  I started by working on the right aileron, getting it caught up to the same point as the left.  The process moves more quickly the second time around, which is always a nice feeling. 

Once the stiffeners were back riveted to the skin and the skeleton prepped, I was able to bend both the left and the right aileron skins with my bending brake.  The skeleton was then placed in the bent skin, and the holes in the side ribs and the aileron skin were match drilled.  The #30 holes were drilled through the nose skin into the counterbalance pipe, and all remaining holes were match drilled.  Both ailerons are now ready to be deburred, dimpled, and primed in preparation for final riveting.

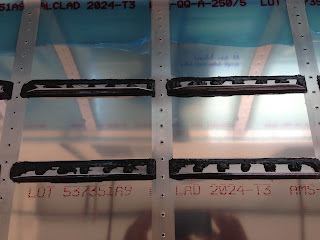
Vinyl removed from right side aileron skin rivet lines
Stiffeners match drilled
Nose ribs deburred
Holes in nose ribs back drilled through skin
#30 holes drilled through skin into counterbalance pipe
Stiffeners back riveted to skin
Skin in bending brake prior to bend
Bend nearly finished
Skeleton placed in skin after bend was complete - nice!
Complete aileron assembled and match drilled
Both ailerons ready to be dimpled, primed, and riveted

Wednesday, November 20, 2013

Begin left aileron construction

Work on the wings has been progressing nicely, albeit slower than I would like.  I decided to start on the left aileron, which uses techniques learned while building the elevators, as I can work on it at the same time as the wings. 

I started by trimming the stiffeners for both of the ailerons, removing the vinyl from the rivet lines of the left aileron skin, and match drilling the stiffeners in place.  Once that was completed, I deburred the end and nose ribs, and ran the stiffeners through the Scotchbrite wheel  to clean up the edges.  The left side spar was then deburred, and the nose and side ribs attached and match drilled.  With the majority of the skeleton assembled, the nose skin was attached to the spar and match drilled in place.  All components were then disassembled and holes deburred.  The skin and stiffeners for the left aileron were dimpled, primed and then back riveted together.  It's nice to see a control surface coming together quickly. 

Left and right side aileron stiffeners cut
Stiffeners match drilled to skin
Nose ribs, end ribs, and stiffeners deburred
Left aileron skeleton assembled without counterbalance pipe
Nose skin attached and match drilled to spar and nose ribs
Reinforcement plates attached to spar and back drilled
Left aileron skin dimpled
Ready for primer
Stiffeners primed
Skin and stiffeners back riveted together

Monday, April 29, 2013

Tank progress

The Proseal becomes easier to work with after a little practice.  I finished the stiffeners on the right side tank after the left side was completed, and riveted the VA-112 drain flange in place.  These rivets can all be reached with a hand squeezer.  I placed a layer of Proseal on the drain flange surface that attaches to the outside of the tank skin, then covered the rivet heads on the inside of the tank with a good sized dab of Proseal.  I countersunk the holes in the fuel cap flange, and fabricated the fuel tank vent clips for both tanks.  The fuel cap flanges are now ready to be riveted and Prosealed. 

Right side stiffeners riveted and Prosealed
VA-112 drain flange attached
Fuel cap flange countersunk to accept dimples in tank skin
Fuel vent clip fabricated and clecoed in place

Sunday, April 21, 2013

Begin fuel tank assembly

With the fuel tank stiffeners cut, deburred and dimpled and the skin prepped, it was time to begin Prosealing the left fuel tank.  I reviewed the several methods people use to accomplish this task, and reached out to a few of my builder friends.  I decided to use the following procedure to Proseal the stiffeners to the tank skin:
  • Thoroughly scuff stiffener and skin attach area with maroon Scotchbrite pad
  • Clean stiffener and skin with acetone
  • Place a small dab of Proseal in dimples from the outside of the tank skin
  • Insert rivets and tape in place with rivet tape
  • Apply a thin layer of Proseal directly to stiffener and place stiffener over rivets
  • Back rivet stiffeners to tank skin
  • Use syringe to run a bead of Proseal around perimeter of stiffener.  Smooth with popsicle stick to form nice filet
  • Place dab of Proseal on each shop head, completely covering shop head and dimple
  • Check for gaps in Proseal coverage, and fill accordingly
After using this procedure for several stiffeners, I decided to try applying the Proseal directly to the skin rather than to the stiffener.  Using a hobby paintbrush with the bristles cut down, it was easy to apply the Proseal to the skin and obtain a nice uniform layer.  This method worked better for me.

Workbench covered with plastic sheet to keep everything clean
All materials laid out for convenient access
Thin layer of Proseal applied to stiffener
Alternate method - apply Proseal to skin with syringe and spread with brush
Back riveting stiffeners
Left side tank stiffeners completed

Monday, February 4, 2013

More wing skin work

With all of the skin holes match drilled to the skeleton and the vinyl removed from the rivet lines, it was time to dimple all of the skins.  I attached a small shelf between my two work tables, which allowed me to set my DRDT dimpler at just the right height between them.  I dimpled all of the holes in the upper and lower skins, and deburred all of the edges.  I also cut the two wing walk doublers, and back drilled them using the top inboard skin as a template.  Vinyl was then removed from the doubler plates, edges were deburred, and holes were dimpled.  I then test fit the leading edge and the fuel tank on each spar.  Moving closer to riveting the skins to the skeleton!

Dimpling wing skin
Outboard top left skin deburred and dimpled
Back drilling wing walk doubler
Wing walk doublers ready to be dimpled
Leading edges and fuel tanks test fit to both spars

Sunday, January 27, 2013

Prepping main wing skins

For the last few days, I've been taking care of the steps to get this main wing skins ready for riveting.  It's nice to have the skeletons of both wings assembled, and installed in the wing stand.  I clecoed the top skins to both wings, and match drilled all of the holes.  Once that was finished, I repeated the process for the bottom skins.  There are a lot of holes, but it seems to take longer to to move the clecoes than it takes to drill the holes.  With all of the holes match drilled, the skins were removed from the skeleton, the blue vinyl was removed from the rivet lines, and the holes were deburred on both sides with a speed deburr tool.  The next steps will be to deburr all of the skin edges and dimple all of the holes.

Top skin attached to skeleton and match drilled
Bottom skins ready for match drilling
Match drilling bottom right skin
Vinyl removed from rivet lines
All holes deburred with speed deburr tool - only about 1 turn is necessary.